
Step 1
Click on the "Log In" Icon and text that you can find on the left side of the screen.
Pokémon Player IDs are necessary to participate in Pokémon League related events such as pre-releases, tournaments, challenges, etc. This gives the Pokémon Company International a way to follow up how active a League is. Based on these numbers they will decide how many prices, goodies and even events to assign to a league.
To create a Pokémon Player ID, you need a Pokémon Trainer Club Account. If you already have this, you can skip a few steps and jump to here.
To create a Pokémon Trainer Club Account, go to the Pokémon website: www.pokemon.com or go straight to the account creation page using this link. If you use the second link, you can skip steps 1 and 2.

Click on the "Log In" Icon and text that you can find on the left side of the screen.
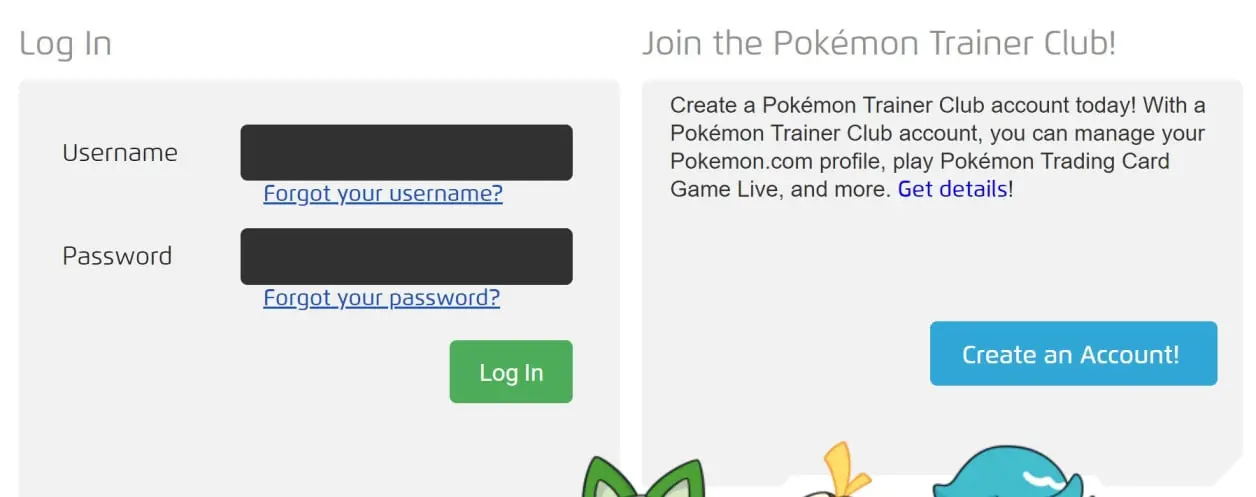
Click on the "Create an Account!" button that you can find on the right of the screen.
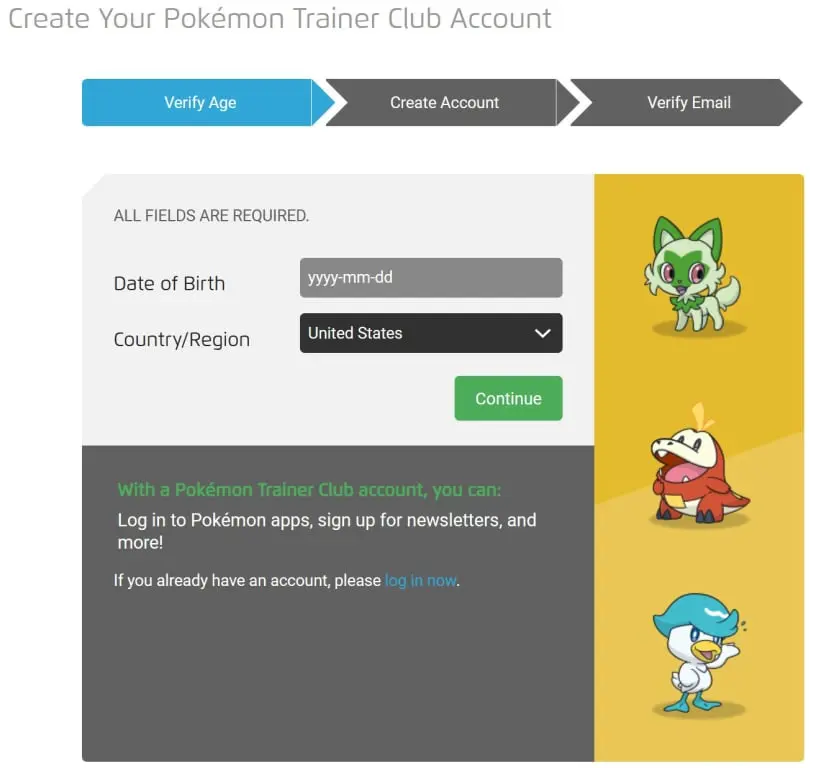
The Pokémon Company will first verify your age and your country / region.
Your age is verified by entering your Date of Birth.
Your country/region can be selected from the dropdown box.
Click Continue to go to the next page.
Your date of birth is used to determine to which age group you belong, so it is important that you enter your own date of birth and not one of someone who is older! This is a value that cannot be changed once the account has been created, so if the date is not correct you will have to create a completely new account.
If you are younger than 13, you will not be able to create a Pokémon Trainer account. You will receive the following message: "We are unable to create an account for you. Your parent or guardian can create an account for you. Enter his or her email address so he or she can be asked to create your account."
Once your parents or guardians have an active account, they will be able to create a "Child" account for you. When you reach the age of 13, the accounts will automatically be unlinked from each other.
How to create the Child account is explained below.
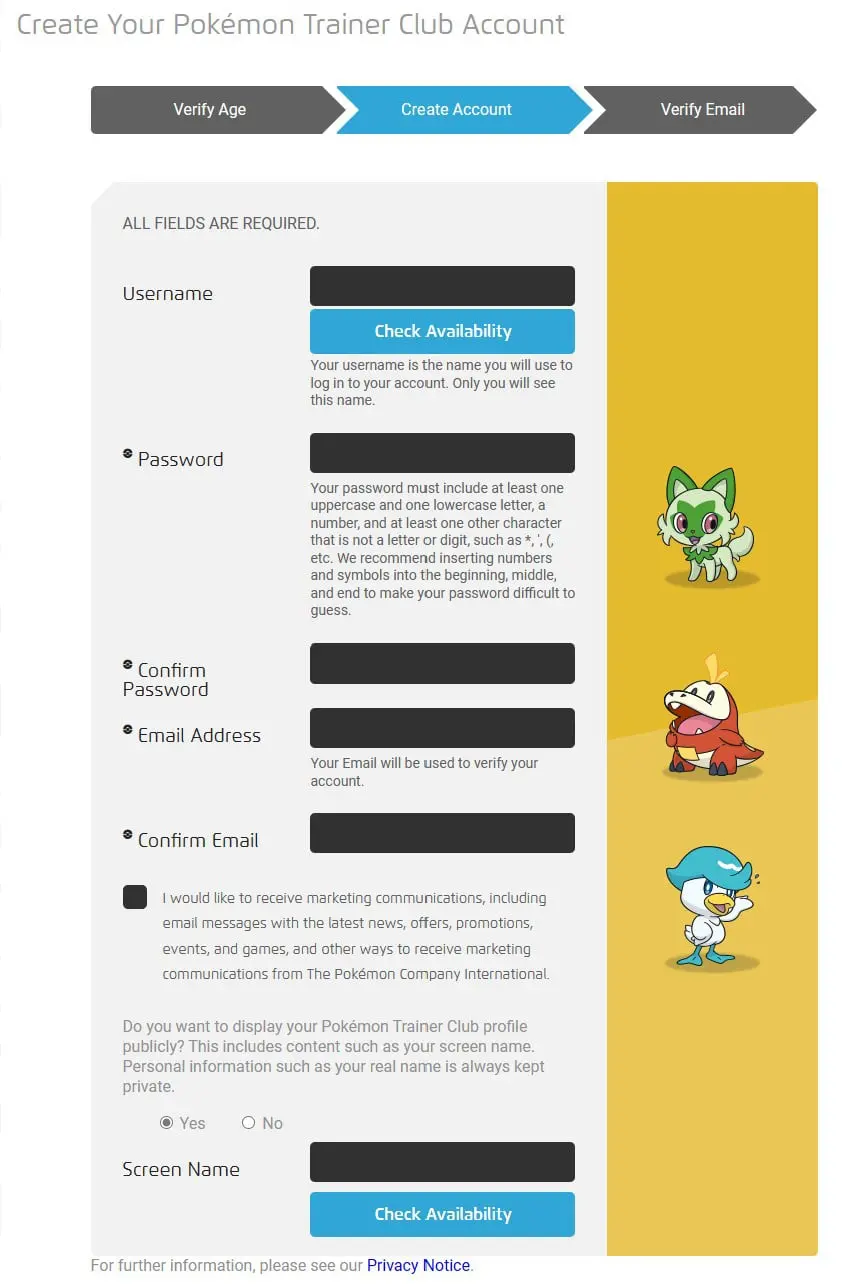
On this page you will have to fill in the following:
- Username: your username is the name you will use to log in to your account. Only you will see this name.
This does not have to be your real name; you can select any name you want if it is a unique Pokémon Trainer name.
When you enter your desired username, click on "Check Availability" to verify that the name isn't being used yet.
- Password: after you select your username, you can enter your password. As for every password, it must follow certain rules to make the password secure.
Your password must include at least one uppercase and one lowercase letter, a number, and at least one other character that is not a letter or digit, such as *, ', (, etc. We recommend inserting numbers and symbols into the beginning, middle, and end to make your password difficult to guess.
- Confirm Password: enter your password a second time to confirm it.
- Email Address: enter your email address.
This address will be used to verify your account. So, verify that there is no error in it.
- Confirm email: enter your email address a second time.
- Marketing communications checkbox: select this is you would like to receive marketing communications from The Pokémon Company International.
- Pokémon Trainer Club profile publication: select whether you want your Pokémon Trainer Club profile to be displayed. This publication includes content such as your screen name. Your personal information such as your real name is always kept private.
- Screen Name: fill in the screen name that you want to use. Like your username, this needs to be a unique name, so you need to check the availability by using the "Check Availability" button.
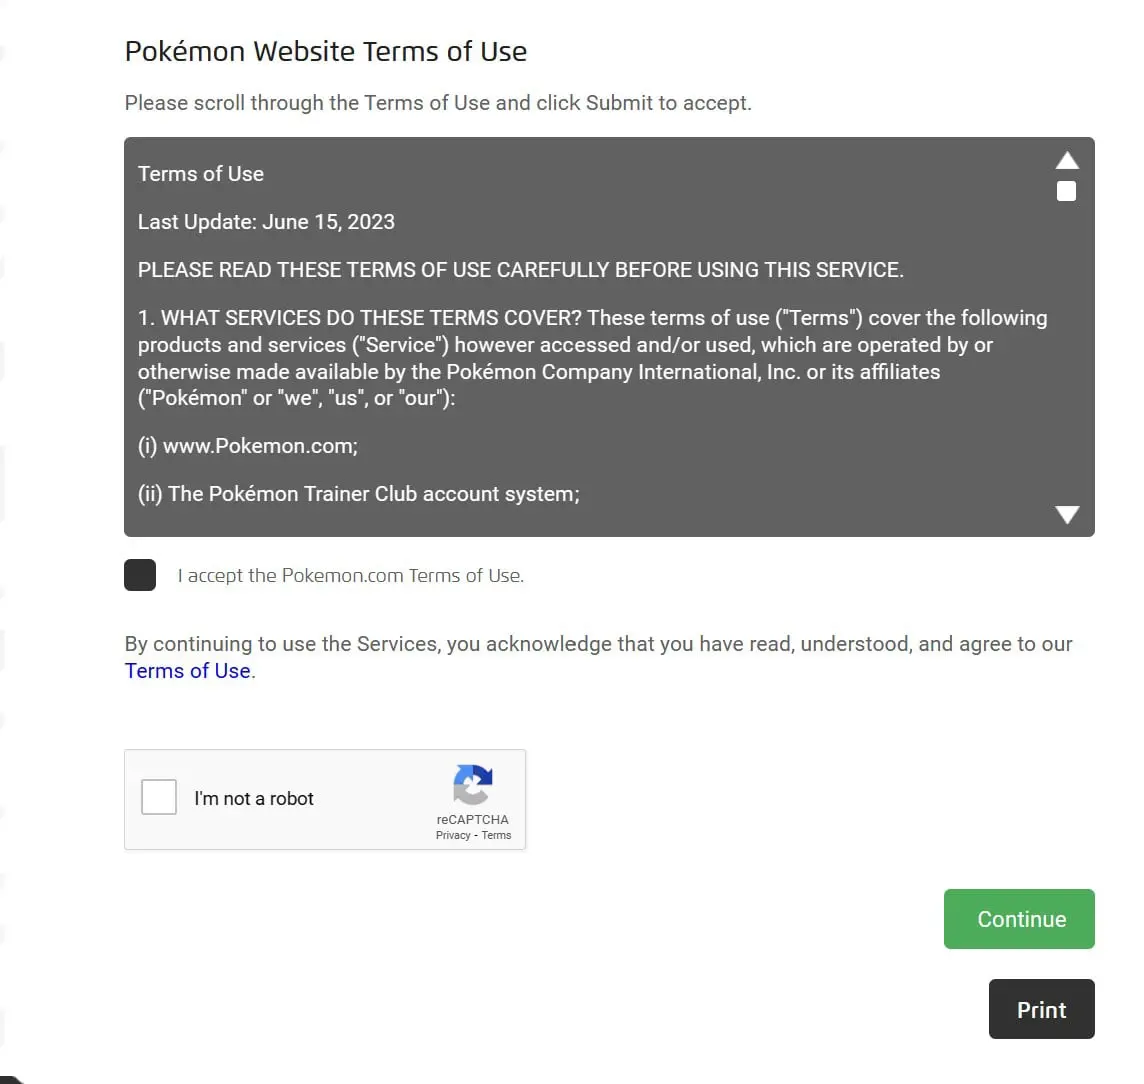
Next you will need to accept the Pokémon.com Terms of Use.
And prove that you are not a robot by selecting the "I'm not a robot" checkbox in the reCAPTCHA box.
When all this is done, click on "Continue" to go to the next step. An activation email will be sent to you.
The Print button gives you the possibility to print the Terms of Use.
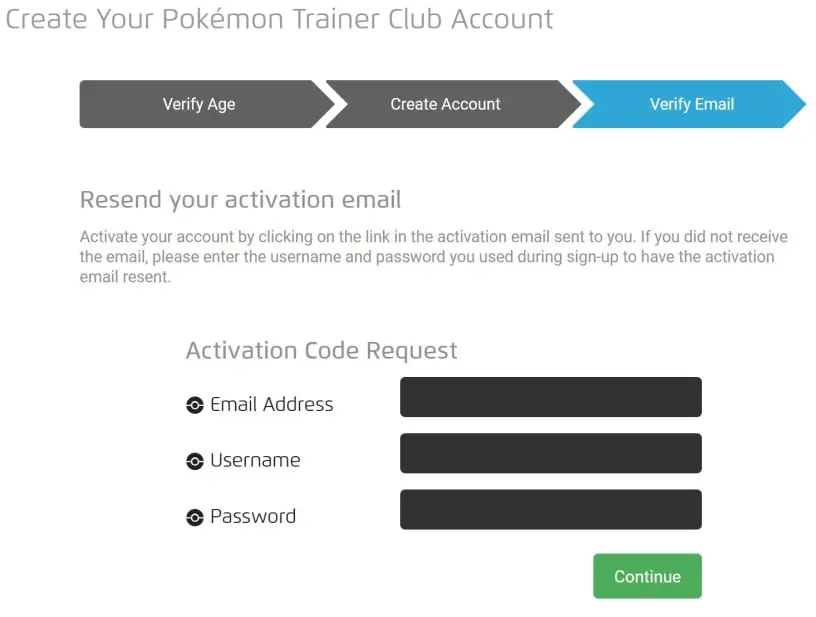
Activate your account by clicking on the link in the activation email sent to you. If you did not receive the email, please enter the email address, username, and password you used during sign-up to have the activation email resent.
You have up to two weeks to use your Pokémon Trainer Club account without verifying it. After that time, you will have to verify your account before you can log in again.

To add a child to your account, you need to log in to your Pokémon Trainer Club account.
Select "Add a child" from the menu on the left side of the screen. This will take you to the Verify Your Identity page.
Fill in the blank field for each section:
- Child's Date of Birth
- Child's First and Last Name
- Child's Username
- Child's Password
- Confirm Child's Password
- Child's log in email (select which applies)
- Child's Social Settings
- Child's Screen Name
- Child's Marketing choice
Read and accept the Pokémon Website Terms of Use.
Click "Create your Child's account".
Once your Pokémon Trainer Club account has been created, you can request a Pokémon Player ID.
If you are younger than 13, your parents will need to request a Pokémon Player ID for you. The same steps as here below need to be followed; they only need to pay attention that they open the menu of the child account to request the Player ID.
To do this, you need to log in to your account.

Click on the "Log In" Icon and text that you can find on the left side of the screen.

Fill in your Username and Password in the corresponding fields and click "Log In".
This will take you to your Pokémon Trainer Club account profile.
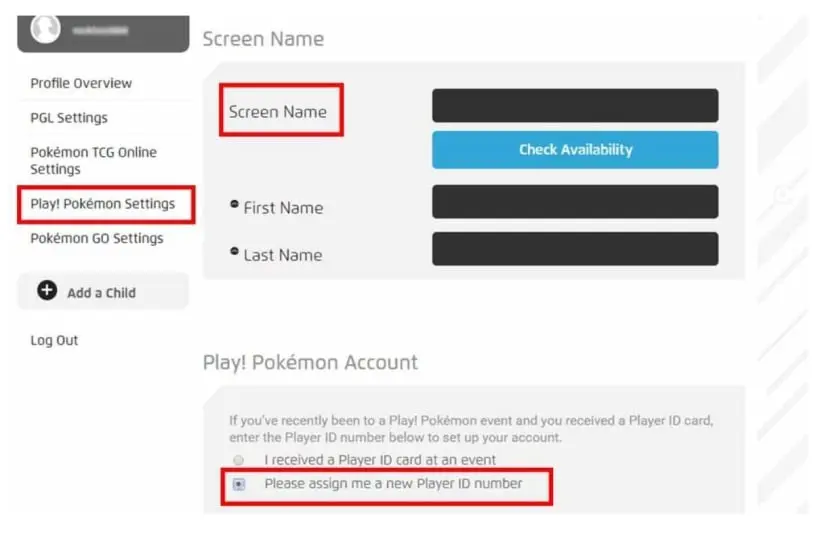
From the menu on the left side of the screen, select Play! Pokémon Settings.
Fill in your Screen Name (if not filled in yet).
Fill in your First and Last Name.
Afterwards, select the radio button which corresponds to your situation:
- I received a Player ID card at an event
- Please assign me a new Player ID number
The second option will be the more likely option.
Once this is done, you will be able to see your Player ID under your Screen name.
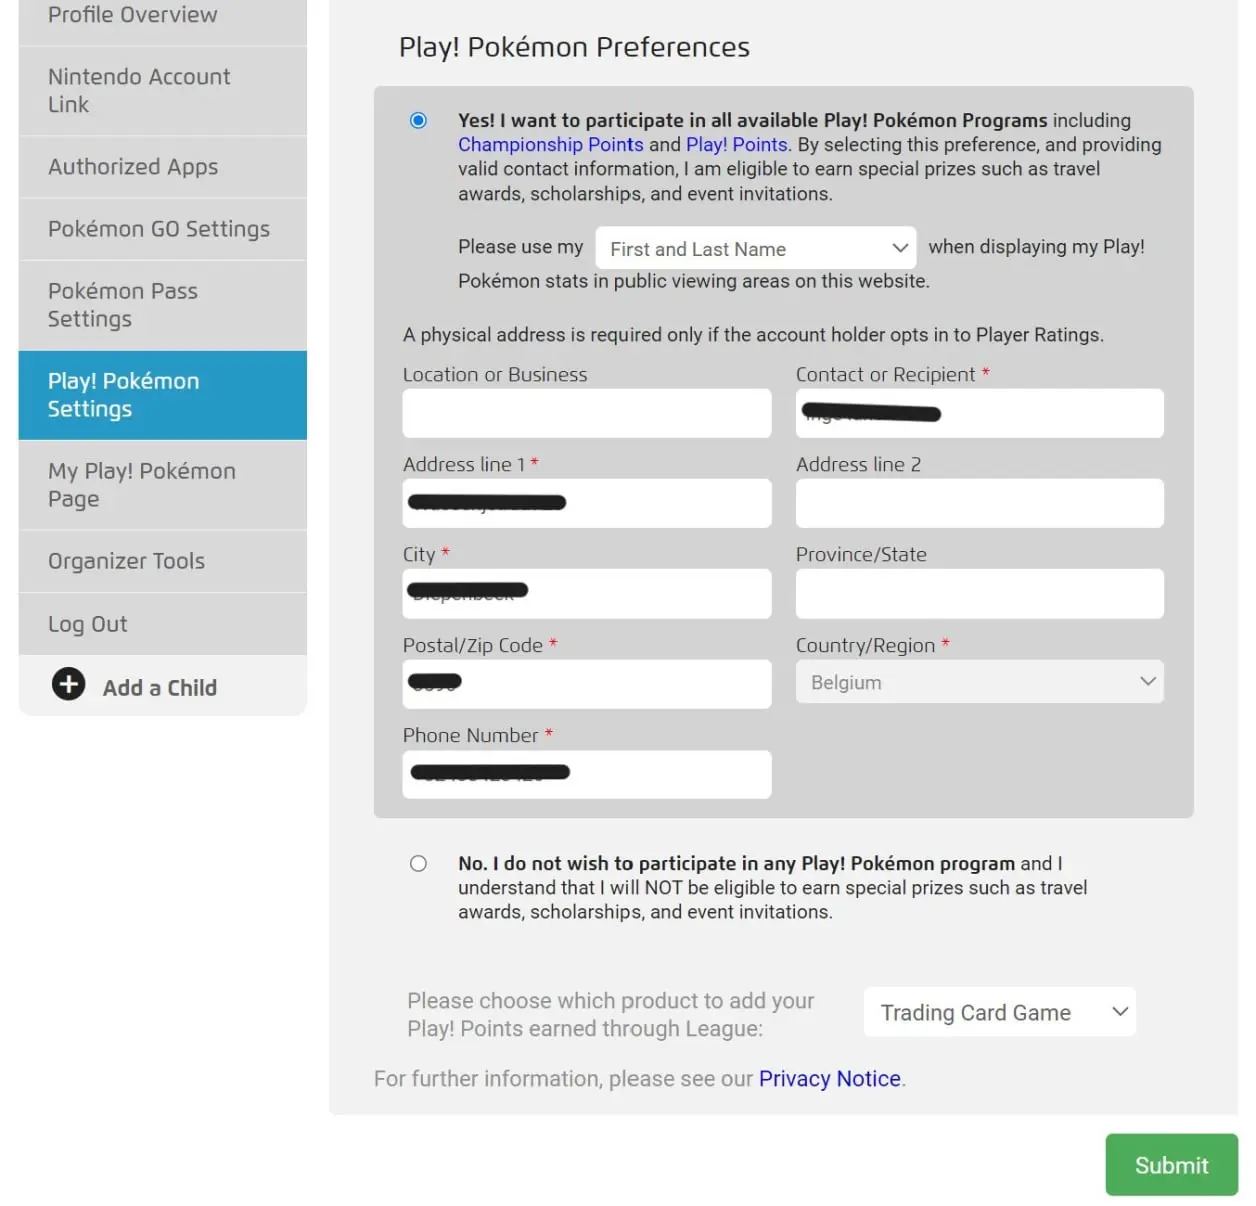
If you want to participate in an event and receive the championship points, you will need to activate this.
This is done in the section "Play! Pokémon Settings" as well.
Make sure that you select "Yes! I want to participate in all available Play! Pokémon Programs ..." to receive the points.
You can choose to show your screenname instead of your First and Last Name if you want.
Also select which product to add your Play! Points earned through League to.
Click Submit afterwards to register your settings.
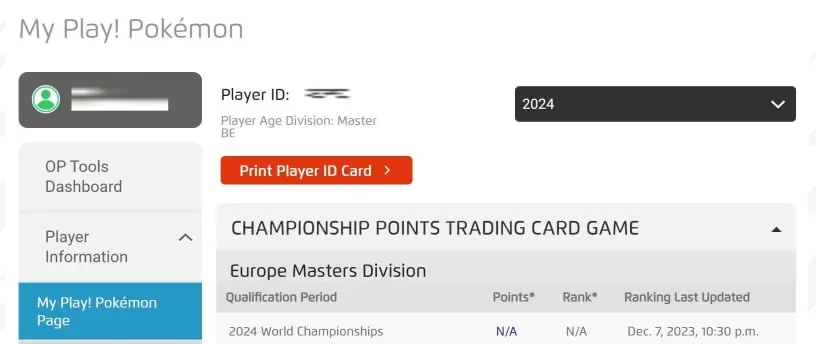
It can be easier if you print your Player ID.
You can find this possibility on your Pokémon Trainer Club Account profile page.
Select My Play! Pokémon Page from the menu on the left side of the screen.
On the top of this page, you have a button "Print Player ID card".
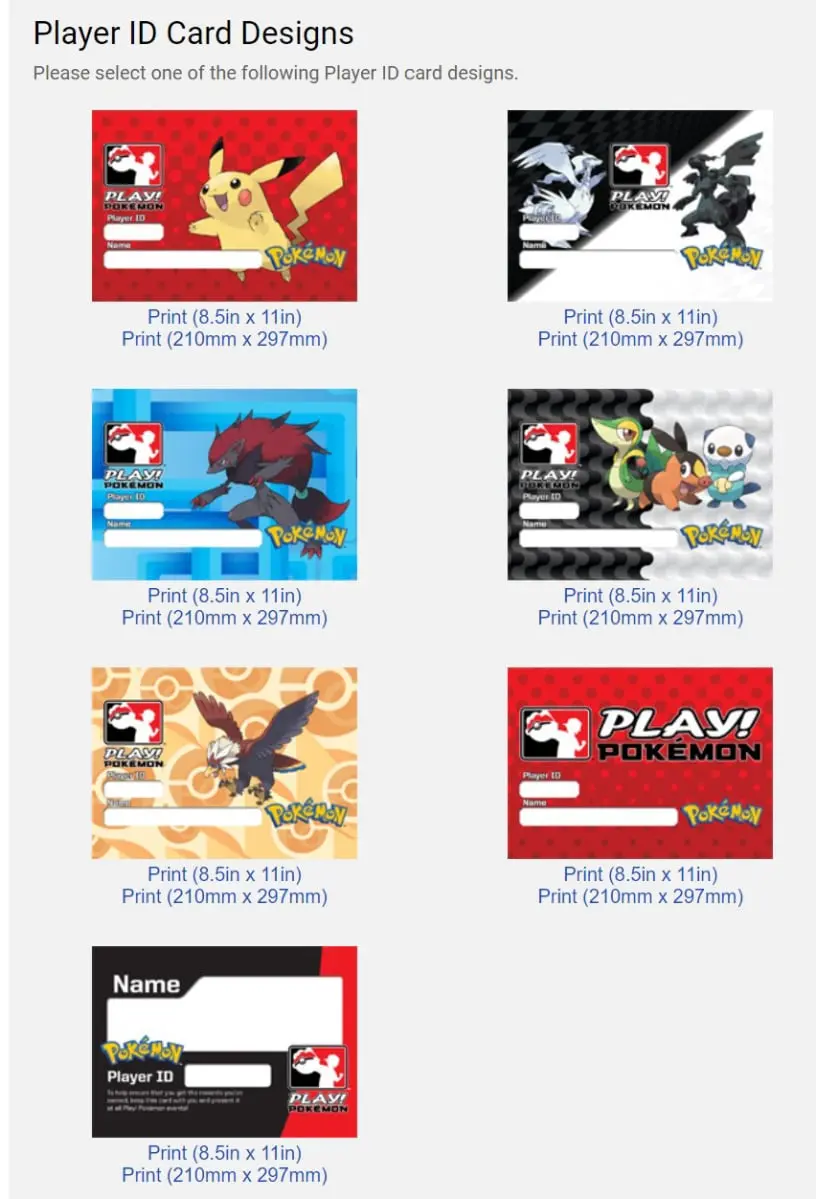
This will give you several designs to choose from.
Just click on "Print (210mm x 297mm)" under the image of your choice. This will create a .pdf document that you can download to your computer.
All the information will be filled in automatically. So, all you need to do is print the document and cut out your card to the size you want.
If you can't choose a design, you can just download all of them.